ShopDreamUp AI ArtDreamUp
Deviation Actions
A shot from a photoshoot of a Yoko cosplayer (MisaLynnCLP) in the middle of a lobby/lounge of a hotel or convention center | Photo by KG Photos
Introduction
Cosplay photographers! It is well-known: anime conventions, small or large, are always full of people (crowds). With private cosplay photoshoots becoming more and more common-place these days at cons, the number of good shoot locations goes down rapidly during peak hours, ie. from late morning to late afternoon (9 am to 6 pm). With time risking to run short the longer and farther you search for available spots, you must use whatever locations you can find within an acceptable amount of time. And most of these quick-found locations have still some people in the background.

The lobby of a convention center during peak hours of a con... CROWDED!
(p: MrJechgo)

Popular landmarks of a convention venue will always be occupied, no matter what time of day
(p: Henrickson me)
But guess what? People in the background won't pose too much of a problem if you follow my "Photoshoots Anywhere" technique! Here's how you can achieve decent photoshoot photos in less-than-perfect locations at anime conventions.
1. Main Principles of the "Photoshoots Anywhere" Technique
2. Shoot Location Criteria: What Should your Spot Have and not Have
3. Lighting Setup
1. Main Principles of the "Photoshoots Anywhere" Technique
The fundamental rule of photography that the "Photoshoots Anywhere" technique uses is the Inverse-Square Law, which states that "the intensity (illuminance or irradiance) of light radiating from a light source (energy per unit of area perpendicular to the source) is inversely proportional to the square of the distance from the source; so an object (of the same size) twice as far away, receives only one-quarter the energy (in the same time period)." [Wikipedia]
<da:thumb id="268097213"/>
The main look/style of the "Photoshoots Anywhere" technique is Low Key, with shadows and dark tones dominating the image and highlights mainly on the subject. You get a well-lit cosplayer with a black or dark background, and the viewer's focus is on the well-lit subject, since the eyes are naturally drawn to the brightest parts of the photo.
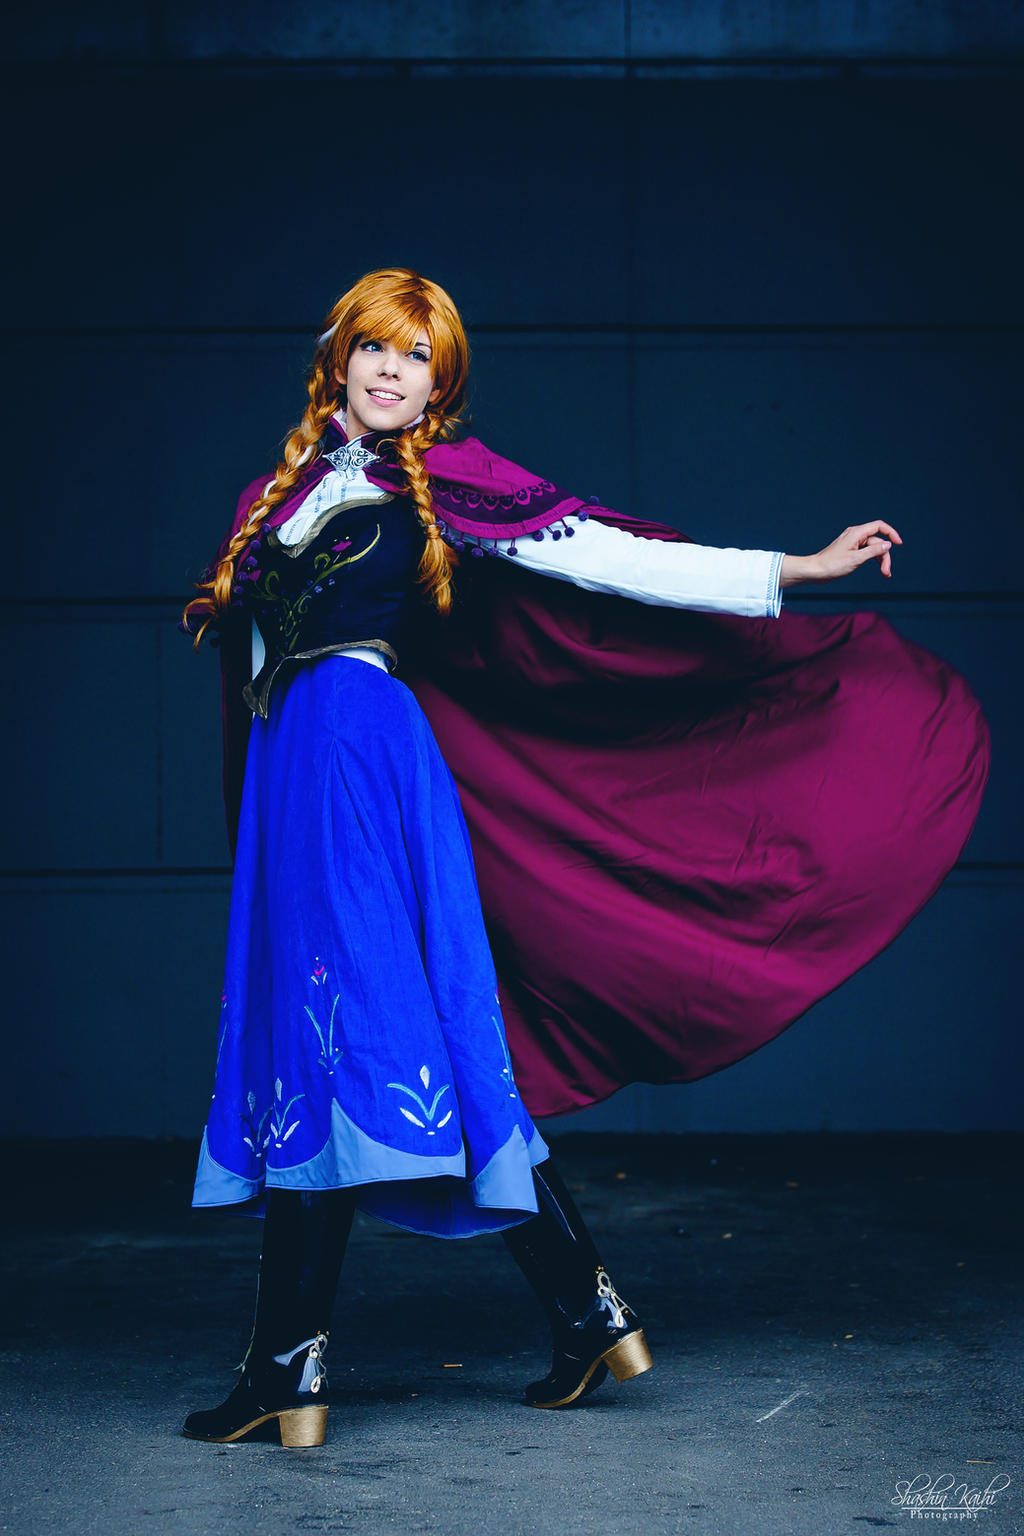
![Cosplay Saber Lily - Fate Stay Night [ECG 2012] by MahoCosplay](https://images-wixmp-ed30a86b8c4ca887773594c2.wixmp.com/f/6f20aa4c-814c-49c8-9a9b-06ca594e4b8d/d5bk2b9-36693099-5f29-4049-8de8-705de269314b.jpg/v1/fill/w_1095,h_730,q_70,strp/cosplay_saber_lily___fate_stay_night__ecg_2012__by_mahocosplay_d5bk2b9-pre.jpg?token=eyJ0eXAiOiJKV1QiLCJhbGciOiJIUzI1NiJ9.eyJzdWIiOiJ1cm46YXBwOjdlMGQxODg5ODIyNjQzNzNhNWYwZDQxNWVhMGQyNmUwIiwiaXNzIjoidXJuOmFwcDo3ZTBkMTg4OTgyMjY0MzczYTVmMGQ0MTVlYTBkMjZlMCIsIm9iaiI6W1t7ImhlaWdodCI6Ijw9MTA2NyIsInBhdGgiOiJcL2ZcLzZmMjBhYTRjLTgxNGMtNDljOC05YTliLTA2Y2E1OTRlNGI4ZFwvZDViazJiOS0zNjY5MzA5OS01ZjI5LTQwNDktOGRlOC03MDVkZTI2OTMxNGIuanBnIiwid2lkdGgiOiI8PTE2MDAifV1dLCJhdWQiOlsidXJuOnNlcnZpY2U6aW1hZ2Uub3BlcmF0aW9ucyJdfQ.W4ngtsnZPzRXhc3-zfzACoToJ0NEMz6jP3dpD8exSCk "Cosplay Saber Lily - Fate Stay Night [ECG 2012] by MahoCosplay")
A Low Key image, dominated by dark tones
(c: MahoCosplay | p: Flexgraph Photos)
To achieve this look, the subject and the background need to be lit by 2 different sources of light - if they were lit by the same source, then they would have the same illumination - with the light on the subject much stronger than the light on the background. This is achieved with flashes/speedlights or reflectors. It's difficult, though not impossible, to get a dark background lit by the sun or strong projectors, by "overpowering" those sources of light with the one shining on the subject, as long as you have the gear to do so.

A photo taken without flash, ie. with available light only: the subject and the background are equally lit
(p: Henrickson me)

But here, the subjects and the background are differently lit (different exposures)
(c: Shane Rideout, Yvonne Pon, Meevers-Desu | p: Torremitsu)
How a cosplayer lit by reflected natural light may look like. The background is dark AND in the shade.
(c: MahoCosplay)
2. Shoot Location Criteria: What Should your Spot Have and not Have
You'll never find a perfect spot during peak hours of an anime convention unless you're really, really lucky. To maximize the effectiveness of the "Photoshoots Anywhere" technique, you must find a spot where the background is far enough from the subject to become as close to black as possible in your photos.
Your photoshoot location should preferably have:
- Enough space around the cosplayer to set up off-camera flashes, on lightstands or handheld by helpers
- A background at least 4 times as far as the distance from the closest flash to the subject
- Low-enough traffic so that no one walks accidentally into your shots

A location such as this one could be OK, as long as the camera aims away from the windows and the ceiling lights (or a stronger flash power setting is used)
(p: MrJechgo)
The spot should preferably not have:
- Background or midground elements next to the cosplayer
- A bright source of light on the background (sun, projectors)
- A light-colored floor

The Gaming Room ain't exactly the best location... for various reasons
(c: DokiMomo, Spyross, GiH-Crafting | p: MrJechgo)
Let me explain each criterion:
- Enough space: Finding a spacious spot guarantees you almost every other requirement. Flashes need to be positioned and aimed in specific directions.
- Far background: An important aspect of the Inverse-Square Law. The background needs to be far enough so that it wouldn't be lit by the strongest flash.
- Low traffic: Reduces random background obstacles and session interruptions. You get cleaner photos and better concentration during your shoot.
- No nearby elements: People and objects located at different positions but at the same distance from your flashes will get the same amount of illumination. You only want your cosplayer to be fully-lit.
- No bright lights on background: The sun or projectors have enough illumination power to match the light shining on your subject, so the background would be as lit as your subject. Something you don't want.
- No light-colored floor: As the piece of land where your cosplayer would be standing would be at the same distance as your flashes, it would be as lit as your subject. A bright floor can be quite distracting.

This spot could work well, but the more criteria a location satisfies, the more people would want to use it!
(p: MrJechgo)
Examples of quickly-found locations that could easily satisfy most criteria:
- Quiet area of a large convention center lobby, in the shade
- Unused area of an exhibition hall, sometimes the Registration Room after the main badge pick-up rush at the con's opening
- Open area outdoors, near the lobby entrance, in the shade

This is a wide-open space, but it's packed full during peak hours
(c: sokacosplay, melcosplay | p: MrJechgo)
Examples of locations that fail most criteria:
- Large hallways where lots of people pass by
- Middle of a Dealers Room
- At the entrance of any important room (Dealers, Registration, any panel room)

Artists Alleys, just like Dealers Rooms, are always crowded. Don't shoot there.
(p: Henrickson me)
Exceptions to these criteria:
- Black drapes or walls: Most cons have tall barriers made of black fabric. This can negate the far background and no nearby elements requirements.
- "Fans": Your cosplayer's character is a singer, comedian or other celebrity, and they usually have fans around them. The nearby people can stand in as "fans" of the character.
- Patterned background lights: Lights with interesting patterns in the background can sometimes work out. It depends on what you can find and how you use it.
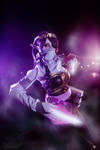
Ooooh, those are some pretty lights in the background!
(c: MisaLynnCLP | p: MH Photos)
3. Lighting Setup
The most important thing to maximize the effectiveness of the "Photoshoots Anywhere" technique is to have a light as bright as possible on the subject you're photographing. This can be achieved with flashes/speedlights or sunlight bounced on a reflector. While lighting your subject, great care must be taken to not spill your strongest light onto the background, to maximize the illumination difference between the subject and the background.

On-camera flash works at darkening the background, but images look very unoriginal, as all cameras are capable of on-camera flash and everyone (even beginners) can do it
(c: Tanya Bélanger | p: MrJechgo)
I usually proceed in 3 steps:
- The subject is placed in the open, with lots of space around him/her.
- The camera is positioned and aimed towards the background with the greatest distance behind the subject.
- Flashes are placed as close to the subject as possible, but right outside the camera's field of view.

Important tip: Don't forget to ask your cosplayers to remove their badges during the shoot
(p: Torremitsu)
Camera and flash settings vary with each environment, but are usually the following:
- The main flash fires at maximum (1/1) power. The 2nd flash fires either at max power or 1 stop lower.
- ISO sensitivity is locked at ISO-100 or as low as I can get.
- Shutter speed is locked at 1/200 sec or the flash sync speed of the camera.
- Aperture starts at f/2.8 (widest) but is shrunk with each test shot until exposure on the subject looks good (no over-white skin).
- A 3rd flash is added as needed, firing at max power or 1 stop lower.

Flashes should generally be not included/visible in photos, but can sometimes be kept for effect
(c: Mirazie | p: simplearts)
Flashes may be bare or equipped with either shoot-through umbrellas or softboxes. Light should always travel forward towards the subject, to minimize distance-power losses. For the lens aperture, it's not rare to see f/4.0, f/5.6 or smaller. If you want to maintain a wide aperture for whatever reason, install a Neutral Density (ND) filter on your lens to cut out light instead of shrinking the aperture.


Left: The main flash is close enough to the subject but right outside the camera's field of view
Right: The Back Light was visible in the original photo, but I cropped it to make it slightly less distracting
(c: ValkyDesigns | p: Henrickson me)
The good thing about having all your settings set-up to "perfection" is that you can do several mini-photoshoots in a row without having to redo test shots for each new shoot. This works as long as the distance from strongest flash to subject remains the same for every subject you shoot.


I once did at G-Anime 3 photoshoots one after another with the same camera and flash settings
(c: KitamonPlush, angelcrywolf | p: Henrickson me)
I recommend placing your main flash more sideways for male characters and more to the front for female ones, though sideways lighting may work for some females.


When lighting for males, the Key Light should come from sideways to give that "chiseled" look to the subjects
(Click on each photo for individual credits)


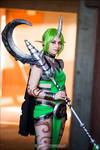
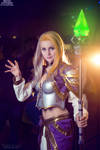
Lighting for females: cosplayers' faces should be evenly lit from left to right
(Click on each photo for individual credits)


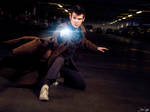
 <da:thumb id="184996372"/>
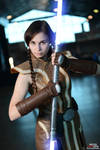
In a twist, sideways lighting (for males) can work for lots of females too!
(Click on each photo for individual credits)


Conversely, female lighting (on the front) can sometimes work for male characters, but not all
(Click on each photo for individual credits)
When desperate for locations and pressed for time to produce decent cosplay photos, the "Photoshoots Anywhere" technique is your solution this now-very-common problem. With practice and experience, your shots will approach the examples below. When faced with a shortage of perfect spots for shoots, just remember to shoot dark and light strong on your subjects in an open area of the convention. Good luck and happy photoshoots!
 <da:thumb id="436012745"/>


<da:thumb id="529760450"/>


(Click on each photo for individual credits)
Big thanks to my buddy
 for providing some sample shots. I salute the creativity of all fellow cosplay photographers who work in such difficult convention environments AND still provide us with beautiful cosplay photos. I hope this technique will inspire more of us to do shoots at anime cons and spend less time looking for suitable locations. For any questions, tips or suggestions on this tutorial, please comment below!
Otakuthon 2016 Tentative Schedule
Hi! Here's my tentative personal schedule for Otakuthon 2016 in Montreal, QC, Canada.
Private photoshoot policy, booking procedure and rates remain the same as always.
Last update 2016-08-03 @ 12:35 am
THURSDAY, AUGUST 4
Attempting to arrive around noon thirty.
12:30 pm - BLOCKED for badge pickup (30m expected)
1:00 pm - OPEN ($30 base rate)
2:00 pm - OPEN ($30 base rate)
3:00 pm - TAKEN
4:00 pm - OPEN ($15 base rate)
5:00 pm - OPEN ($15 base rate)
6:00 pm - OPEN (free shoot)
7:00 pm - THURSDAY EVENING GROUP DINNER | Chez Chili restaurant in Chinatown (1h 30m)
Returning home after the group dinner to pack my luggage and get dow
Anime North 2016 Con Report
Anime North 2016 con report, in point-form:
FRI:
Pulled an all-nighter to pack everything: -3
...Forgot sunscreen: -3
Arrived downtown, enjoyed my A&W breakfast: +2
Win: Bus was pink: +4
Lunch at Harvey's in Kingston: +1
Uneventful road trip: +2
Arrived at Crowne Plaza on time, checked-in: +2
Went to the Intl Plaza to get my Staff badge: +1
Fail: A Ruby dropped and broke her scythe at Weapons Check: -4
Obtained Moonlight Ball ticket: +1
Grabbed food in the TCC Staff Lounge: +3
Covered the opening rush of the Dealers Room from inside: +2
Win: Obtained a ticket for Reika's autographs: +4
...Briefly saw ~IchigoKitty (https://www.deviantart.com/ichigokitty): +1
Otakuthon 2015 Final Schedule
Hi! Here's my final schedule for Otakuthon 2015 in Montreal, QC, Canada. To book a shoot, meet me at the con.
Last update 2015-08-07 @ 12:30 am
FRIDAY, AUGUST 7
My outfit: Civvies, then black polo + urban camo pants
As the con opens before hotel check-in time, I'll park my car and gear up lightly for any available activities until 2 pm.
7:00 am - BLOCKED for transit, car parking (1h)
8:00 am - BLOCKED for breakfast, gear-up, Art Gallery photo exhibit setup (1h)
9:00 am - Walkaround (2h)
11:00 am - Dealers Room, autographs of Cosplay Guests | Rm. 220BCD
12:00 pm - BLOCKED for lunch (1h)
1:00 pm - PANEL: Introduction to the World Co
Otakuthon 2015 Tentative Schedule
Hi! Here's my tentative personal schedule for Otakuthon 2015 in Montreal, QC, Canada. As a tentative convention schedule hasn't been posted yet, I'll use a carbon-copy of my last year's personal schedule.
Private photoshoot policy, booking procedure and rates remain the same as always.
Important note: I submitted 5 panel ideas. Should my panels be confirmed and fall on photoshoot slots, you'll be contacted for conflict resolution (move or cancel shoots). All 5 panel ideas have been accepted and the slots at which they'll take place have been updated below. Should other opportunities open for me, I'll take them as well and contact any affe
© 2015 - 2024 Henrickson
Comments2
Join the community to add your comment. Already a deviant? Log In
*sees a bunch of my photos in there*
Could you at least credit me for those? I'm sorry to say it, but that's a little rude to simply put my photos in there without telling me first, especially for review purposes. Look, I'm all for reviews, comments and stuff, but... if you want to do it, you might want to tell the concerned person or people about it beforehand.
That being said... I don't think I should be angry at you, at all, for critisizing my photos.
1) I'm still "new" to the hobby. It's only been... 5 years since I've started taking photos WITH a reflex camera, so all the inner workings and settings are still relatively new to me. I used to take pictures with a small digital camera. Boy does the high ISO factor shows in those photos. It's also only been 5 months since I've started working with RAW files and the Manual settings; I used to take JPEG pictures with the Automatic setting before that. While it doesn't excuse the quality of some of the shots, it does explain it. So yeah, I'm still in the learning curve to tame the beast") .
.
2) I do not have much equipment with me at the moment. I don't have a better flash, multiple lenses, filters and such. So... when I'm taking pictures, I work with what I have at hand. That might change in the future as I start to upgrade though. A better flash might be useful...
3) To my defense... G-Anime's convention halls... have possibly the crappiest lighting I've ever seen in my life... The "Gaming Room" photo... has been possibly taken in the room with the best lighting, no joke... Apparently, the halls used to be brighter with the sun well, but they covered it... which caused me to constantly used the flash like in the other G-Anime picture you've picked. Since I was afraid that having a longer exposure time would have blurred my photos if I ever moved while breathing, I used the flash... lesson learned... harshly XS
4) You're right about the crowd. That is something I'll look out in the future. I'll go for quieter spots if possible.
5) That might be an issue for some... but I'm trying to get as many cosplays as I can when I go to a convention. Thus... I take them whenever and whereever I can. If I can take them in better spots, go me, but sometimes I'll have to deal with the spot I'm in at the moment. Then again, I'm starting to pinpoint the best spots for photos the more I visit the same places. Hope that will help me in the future. For instance, the WALLS of the Viger Hall are better suited that the center plaza. That should give me an... edge XD
6) I've been experimenting a LOT of Lightroom, as I am trying to find myself a personal visual identity. Yeah, it's been only a few months since I've been tinkering with editing. Colors might be a little off sometimes.
7) I am going more and more for dynamic poses. I recently got a short course on photography, so I'm using that knowledge now. That... and I'm taking inspirations from others photgraphers too (Smile)")
Bottom line: I'll use these tips the next time when I'll go for a photoshoot. Thanks for the journal, but like I said, could you please tell me about using my photos before using them? That would be the best way to help people ^_^
Could you at least credit me for those? I'm sorry to say it, but that's a little rude to simply put my photos in there without telling me first, especially for review purposes. Look, I'm all for reviews, comments and stuff, but... if you want to do it, you might want to tell the concerned person or people about it beforehand.
That being said... I don't think I should be angry at you, at all, for critisizing my photos.
1) I'm still "new" to the hobby. It's only been... 5 years since I've started taking photos WITH a reflex camera, so all the inner workings and settings are still relatively new to me. I used to take pictures with a small digital camera. Boy does the high ISO factor shows in those photos. It's also only been 5 months since I've started working with RAW files and the Manual settings; I used to take JPEG pictures with the Automatic setting before that. While it doesn't excuse the quality of some of the shots, it does explain it. So yeah, I'm still in the learning curve to tame the beast
2) I do not have much equipment with me at the moment. I don't have a better flash, multiple lenses, filters and such. So... when I'm taking pictures, I work with what I have at hand. That might change in the future as I start to upgrade though. A better flash might be useful...
3) To my defense... G-Anime's convention halls... have possibly the crappiest lighting I've ever seen in my life... The "Gaming Room" photo... has been possibly taken in the room with the best lighting, no joke... Apparently, the halls used to be brighter with the sun well, but they covered it... which caused me to constantly used the flash like in the other G-Anime picture you've picked. Since I was afraid that having a longer exposure time would have blurred my photos if I ever moved while breathing, I used the flash... lesson learned... harshly XS
4) You're right about the crowd. That is something I'll look out in the future. I'll go for quieter spots if possible.
5) That might be an issue for some... but I'm trying to get as many cosplays as I can when I go to a convention. Thus... I take them whenever and whereever I can. If I can take them in better spots, go me, but sometimes I'll have to deal with the spot I'm in at the moment. Then again, I'm starting to pinpoint the best spots for photos the more I visit the same places. Hope that will help me in the future. For instance, the WALLS of the Viger Hall are better suited that the center plaza. That should give me an... edge XD
6) I've been experimenting a LOT of Lightroom, as I am trying to find myself a personal visual identity. Yeah, it's been only a few months since I've been tinkering with editing. Colors might be a little off sometimes.
7) I am going more and more for dynamic poses. I recently got a short course on photography, so I'm using that knowledge now. That... and I'm taking inspirations from others photgraphers too
Bottom line: I'll use these tips the next time when I'll go for a photoshoot. Thanks for the journal, but like I said, could you please tell me about using my photos before using them? That would be the best way to help people ^_^